If you want to level up your time lapse and hyperlapse game so you can charge more money and save hours of headaches and frustration. I have made a course for you that over 400 students have enrolled in!
I’m confident Hyperflow Masterclass will get you from zero to shooting like a pro or I’ll give you your money back!
Check out the course here to see if it’s right for you.
How to Get the Best Results of Framelapse Timelapse App

This blog post is aimed at helping you get the most out of the intuitive and powerful Framelapse app on your Android device.
Framelapse Download

Before you begin you will want to download Framelapse from Google Play store.
Note that this timelapse app is FREE but there are paid features that may or may not be worth it depending on your needs. Continue reading to see which one’s best for you.
Let’s begin with examining all of the free features made available to begin taking amazing time lapse videos with your smartphone.
Framelapse Free Features

Before you begin you will want to download Framelapse from the Google Play store.
Note that this timelapse app is FREE but there are paid features that may or may not be worth it depending on your needs.
Let’s begin with examining all of the free features made available to begin taking amazing time lapse videos with your smartphone.
Framelapse Free Features

Framelapse is pretty easy to use and intuitive. Once you’ve downloaded the app, click it to launch the app and familiarize yourself with the settings.
In the upper right-hand side (as shown in the image above,) it will display what you currently have as your time lapse settings.
There is also a white button, which is the record button. You can tell you are recording when it turns red as shown below as well as a handy indicator of how long it’s recording for.

On the top left of the screen, you will see an icon that looks like a play button.
This is where time lapses are stored. You can delete, or export your finished time lapses here.

Recorded time lapses are stored in the Framelapse/DCIM. This stands for digital camera imaging.
When you click the trashcan, an option pops up allowing you to delete ALL recordings. Don’t do that unless you REALLY want them all deleted. It is not possible to recover them once deleted.
Framelapse Video Resolution

Framelapse has the ability to record a time lapse with your device’s FULL RESOLUTION. Meaning 4k and higher. It just depends on your camera’s ability to record.
However 4k and above at the time of this are a part of the “PRO” paid options. Otherwise, 1080 is the highest you can get.
Keep in mind if you have front-facing and back-facing cameras on your device, typically front-facing cameras have lower resolution. In short, you may not get high-quality time lapses using the front-facing camera.
Frame Interval Settings

When you click the third icon on the left, looks like a slice of pie. You get the frame interval settings. An interval is one of the most important aspects of taking a time lapse.
An interval is how often the camera will take a photo. In the pro version (featured above) you have intervals as often as .1 second, but can also define them by pressing the custom.
For help choosing intervals, I have this handy guide to help you choose the best time lapse intervals for each subject.
But I typically recommend between 1-10 seconds for most subjects that you’re going to see with your smartphone.

The image above showcases another PRO feature. The ability to choose whatever interval you want. Could be minutes, hours, or even days. Very handy for showcasing LONG TERM time lapses.
Video Duration
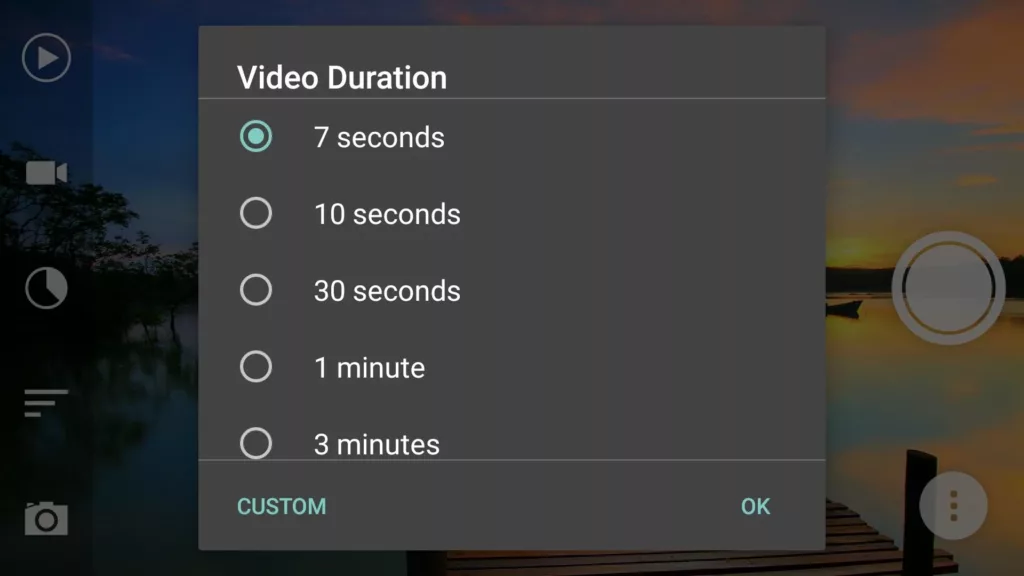
This is probably one of the best features of this app that I’d love to see in more time lapse apps. Video duration is really important because most viewers don’t want to watch a time lapse more than 10 seconds.
So I’d use the first three presets exclusively.
This is great for new time lapse users who don’t want to have to worry about an interval. Simply choose a preset, or define your own. As simple as setting it and forgetting it.
CAMERA SETTINGS

The last button on the bottom left is a little camera icon. andas it would suggest this is where. you can control the camera settings.
The first button on the top left is a self-timer. Just like on most cameras, you click it and then it has an option for 1 second, 2 seconds, 10 seconds, or user-defined.
I recommend 2 seconds so you don’t shake it at the beginning of your shot.
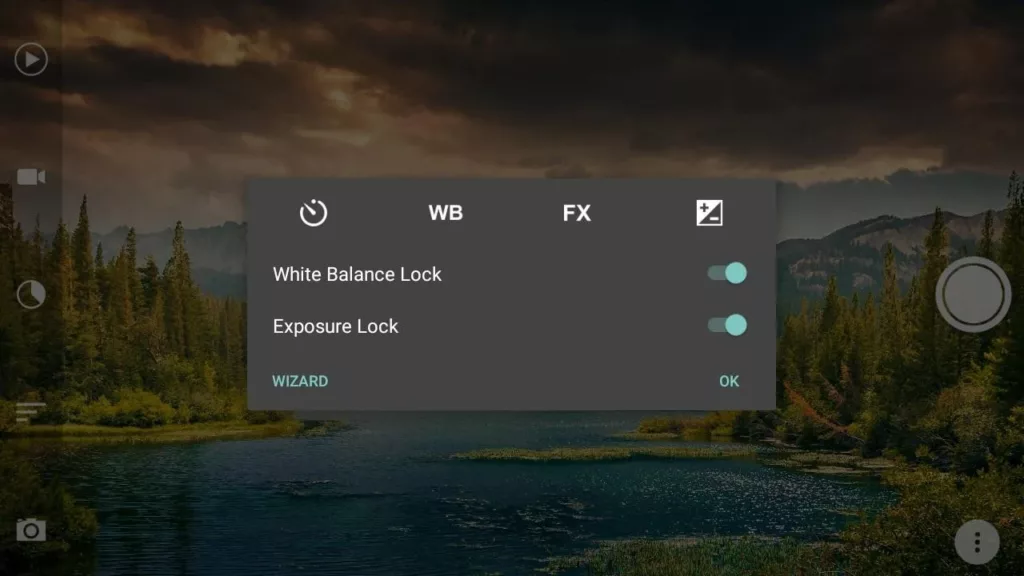
The second button is white balance. When you click on it you can change the white balance from auto to all the other presets.
I would normally NEVER recommend using AUTO. But because it has a white balance lock feature as shown above. Just choose auto and remember to LOCK the white balance.
If you don’t you may notice weird color jumps.
Same with exposure lock. Always lock your exposure once you’re happy.
The next button is the FX. These are filter FX. There are nine different filter effects. The biggest con to these in my opinion is that they record WITH the filter applied. Most of these are filters like black and white and sepia etc. that you can just add on Instagram or other apps. Personally, I don’t recommend using any of these filter fx but they are available should you wish.
Lastly is the exposure compensation icon on the far right.
Here you can adjust up or down an exposure. This is very handy for shooting subjects. I normally leave it on 0. But in certain situations, you might want to under-expose your image so this is nice.
Finally is the Wizard feature. The wizard feature will choose your video frame interval for you.
It works when you program the recording length. Meaning how long you want to record for. Then if you go into video duration and say how long you want the video to be. It will choose your video frame interval.
I use it pretty often since I know I always want my time lapse to be 10 seconds. Then I just say how long I’m going to record it and it chooses the interval for me.
If you look at the photo above, you’ll notice on the bottom right hand of the screen a circle with three dots.
If you click that you access the app settings. You’ll notice the pop-up appears below.

Sleep mode will turn off the display after 60 seconds. Saving your camera’s battery life. Useful in a pinch, only available via PRO version.
The shutter sound will turn on or off the shutter. In case you want to hear a shutter going off to ensure the time lapse is working assuming you put it in sleep mode. I normally keep mine off.
Switching the camera literally swaps from the back camera to the front camera.
Community is a feature that enables you to share with Facebook and Google Plus, I’ve never used it if I’m being honest.
Help will take you to an FAQ guide with common troubleshooting questions, and that’s the entire run down.
If you want to level up your time lapse and hyperlapse game so you can charge more money and save hours of headaches and frustration. I have made a course for you that over 400 students have enrolled in!
I’m confident Hyperflow Masterclass will get you from zero to shooting like a pro or I’ll give you your money back!
Check out the course here to see if it’s right for you.
Conclusion
Framelapse is a pretty comprehensive time lapse app for Android and you can test it out for free or for just a $2.99 upgrade to the pro version.
I definitely find the PRO features of the highest quality resolution absolutely worth it. But if you’re on an older model and don’t like having time lapses take up a lot of space, then the regular version is fine.
The main difference is PRO can record your camera’s FULL resolution while the free version cannot. Also functions like Wizard and Shutter on are also paid features.
Framelapse app allows you to take time lapses with any Android device. It comes in two flavors, free or paid.
It will depend on how many frames per second you shoot. Then just multiply by 60. For example, if shot one frame per second, then you’d have 60 frames per second.
24, 30, and 60 are all common frame rates in the U.S. While PAL countries are 25, 30, and 60.
Launch the app from your home screen and then press record. For any specific questions please refer to the steps above.
They take a series of photos, then stitch them together like a flip book to make a video.