Today we’re going to edit a time lapse in Photoshop. This is perfect for beginners and Photoshop users who don’t want to invest more money into Adobe’s ecosystem and don’t really do much video editing.
The best news is this is simple to do.
Launch Photoshop
The first thing we want to is launch Photoshop then navigate to file and open. As shown in the photo below.

Once we’ve clicked open, we now want to navigate to the folder with images that we have saved out as a JPEG, PNG, or TIFF sequence.
You must have already exported these out as one of those file types because otherwise, nothing will happen. For example, you won’t be able to import RAW images.
So exporting them using Lightroom first is highly recommended.
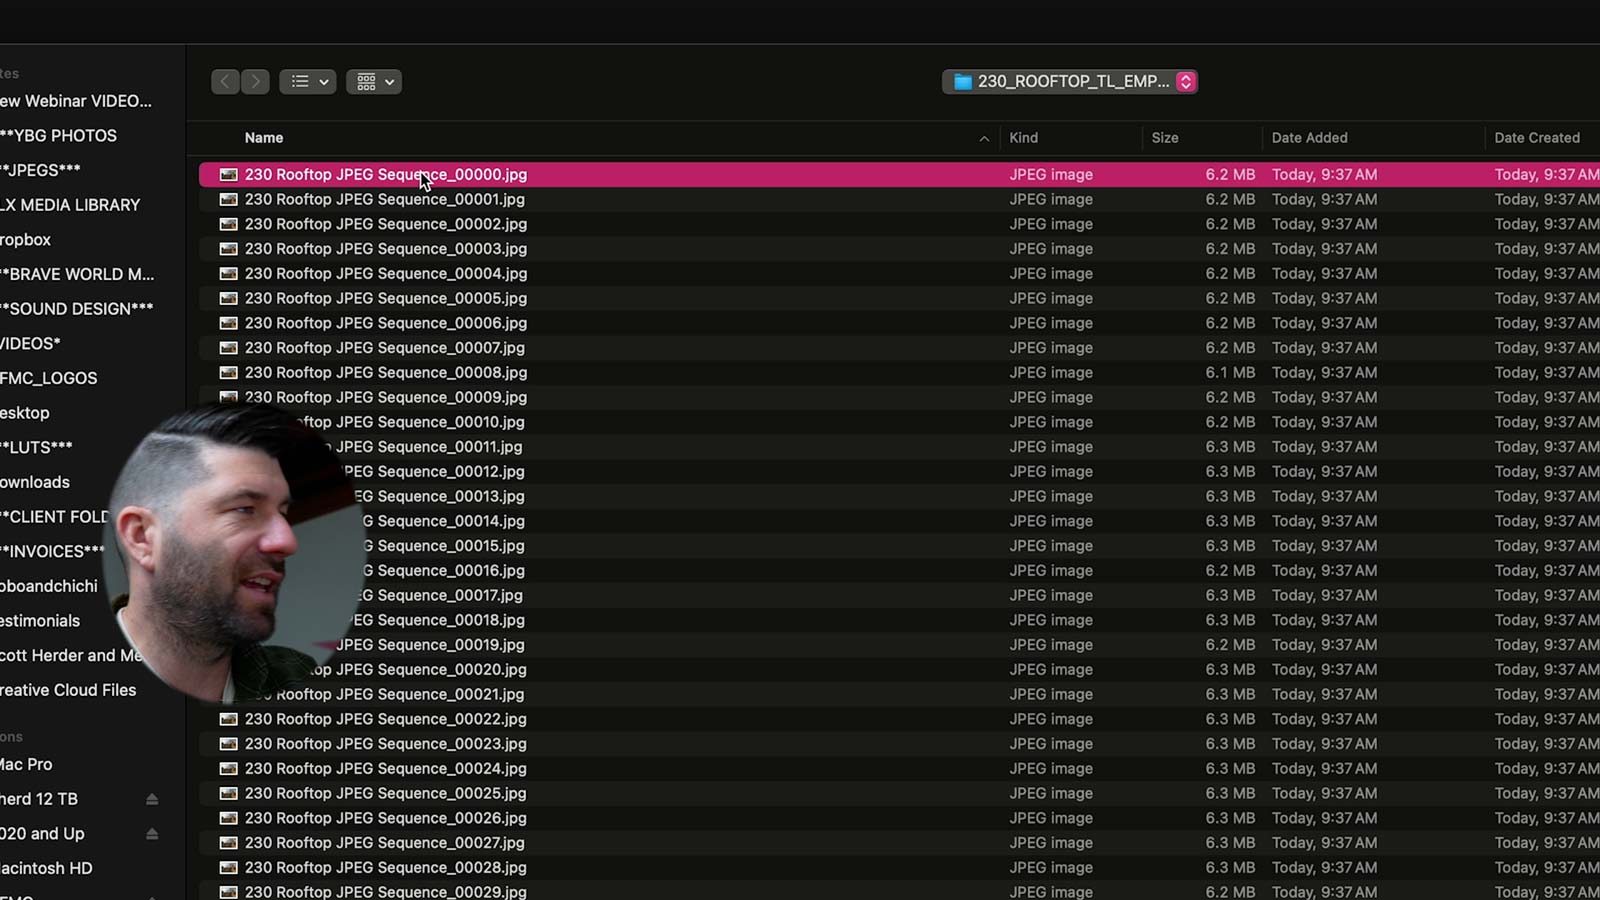
What you want to do is make sure you click the first image in the sequence.
If you choose one in the middle of the sequence, it will start there.
If the numbering system gets interrupted. For example, if image 14 is missing. It will stop at image 13.
Once you’ve confirmed and are happy. Click to check the IMAGE SEQUENCE checkbox. Then click open.

If you forget to click IMAGE SEQUENCE, it will open a single photo. If that happens, no sweat. Just close the file. Repeat this step and make sure you click Image Sequence.
Choosing a Frame Rate for Your Time Lapse

If you are in Europe you will want to choose 25 fps to match PAL.
Anywhere else I recommend 24 or 30. 30 will look a tiny bit smoother, and 60 the “smoothest” but our eyes see most closely to 24 so I default to that.
This topic could be a post itself I just wanted to keep it simple.
Is Photoshop Video Timeline Hidden?
If you don’t edit video or time lapse in Photoshop often, you might not see any changes compared to your normal photo editing.
If that’s the case just know that it is a window you can turn on or off. To do so, go to the window and find the TIMELINE, as shown in the photo below.

Then we will see a new window giving us the ability to animate and preview our time lapse in photoshop.
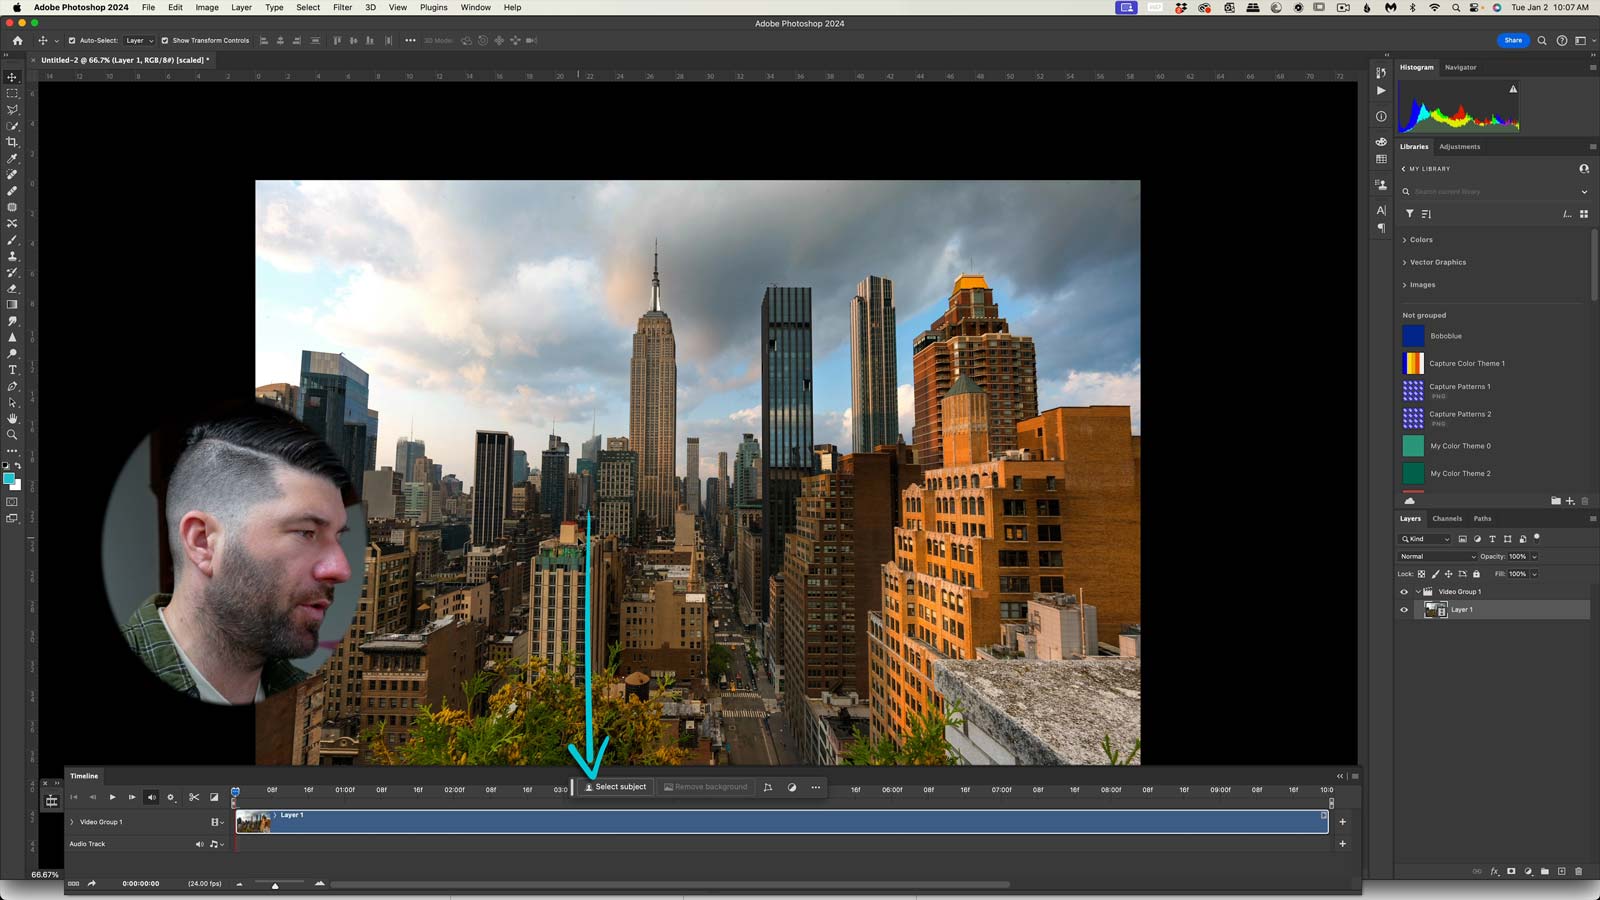
It will be that blue video layer window seen in the photo above.
A few things are worth noting. On the right-hand side, we can see our layers like normal. And the bottom we see the video group with the timeline.

We can play, rewind, and fast forward the time lapse via the video layer AND even add an audio track if you want.

The first time you press play the video might look choppy. The reason is it takes a while to load all the data. Especially if you are using TIFFS.
On the bottom left hand of the screen, you’ll see an indicator of FPS. That is showing you the Frames Per Second that the preview is currently showing you.
If it’s below 24, that means it just needs to load a little longer. Eventually, it will play at normal speed. Could be as quick as 10 seconds, and as long as a couple minutes depending on how big your files are.

You’ll also notice little stopwatches next to terms like Position, Opacity, and other settings. By clicking on a stopwatch icon, you are creating a keyframe to animate the video. Which we will tackle in a second.
Adjusting the Size of the Time Lapse in Photoshop.
Before animating anything, we want to adjust the Canvas size.
When we import a video or time lapse in Photoshop, it automatically loads as whatever size the photo files are.
It’s very easy. We want to navigate to IMAGE and CANVAS SIZE. As shown in the photo below.

Notice how Photoshop loaded it as 4240×2832 and I don’t want that size. I am going to export it for social in a vertical format. That is 1080 pixels wide by 1920 pixels tall.
So I will change the pixel dimensions to 1080×1920. If your Photoshop says something like INCHES, CM, % or anything other than pixels. Just click on the word and change it to pixels.
Once this is done we may need to resize our video footage.
Resizing our time lapse in Photoshop
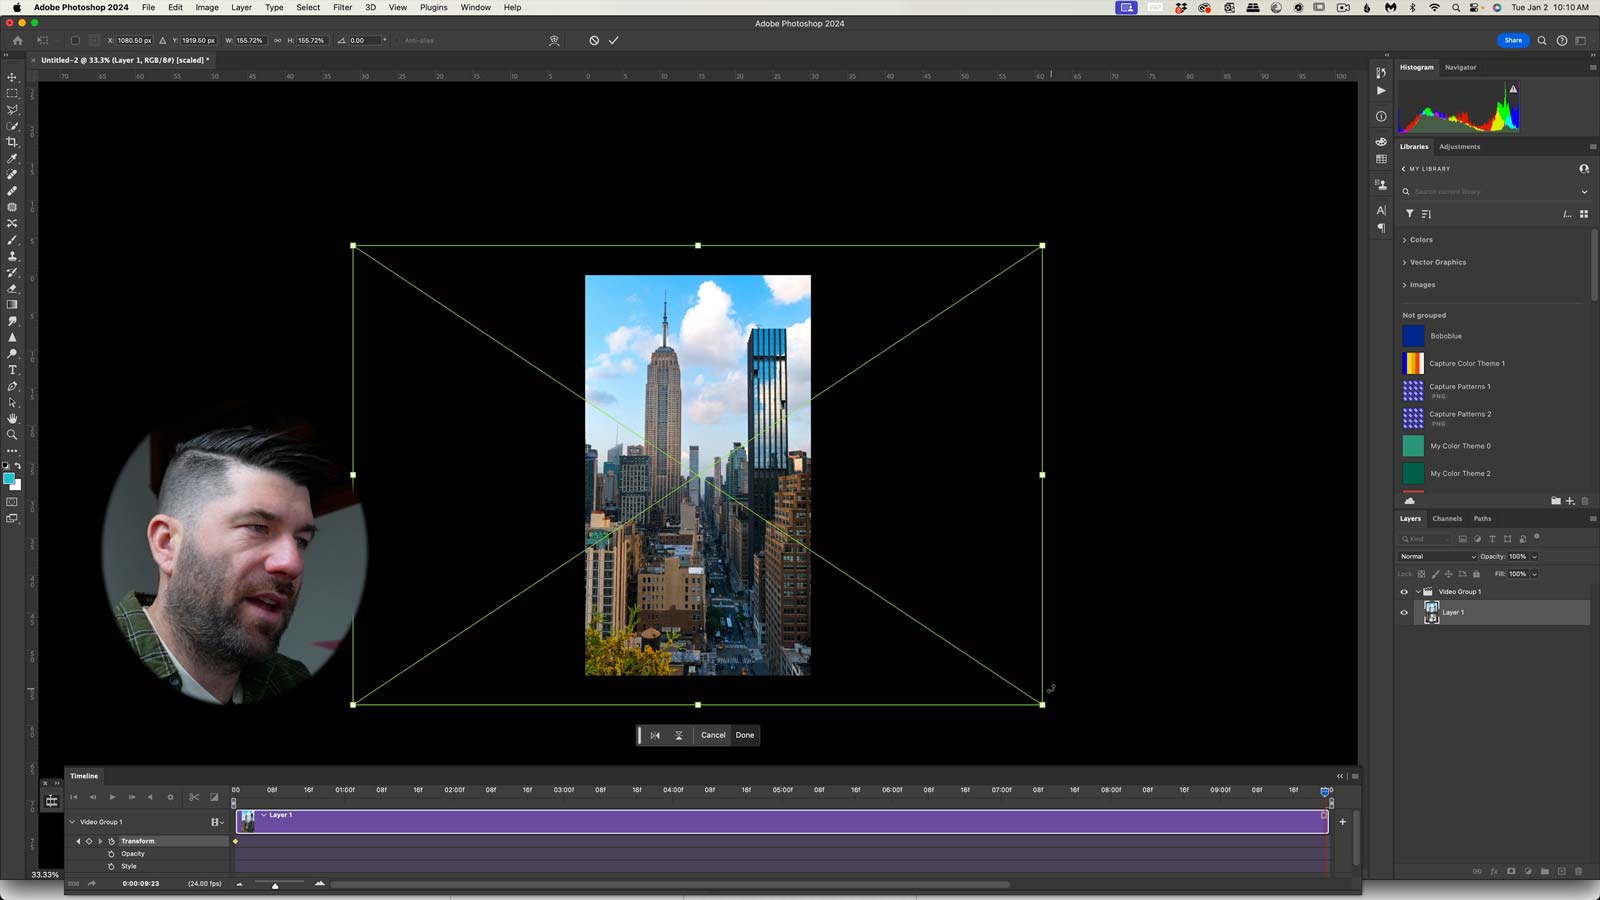
To resize our video, we can hit command T on a Mac (Control T on a PC) to give us the option to transform. For whatever reason, photoshop wants us to have the VIDEO GROUP SELECTED when we do this. If you simply select the layer, you may notice nothing changing.
Try selecting the Video Group, then command T on a Mac and control T on a PC.
This will allow you to freely transform the dimensions of the file and make it fit how you want.

Pro Tip: Holding shift will constrain the file so you don’t screw up the proportions. Holding shift + option will do the same thing but do it from the center. Completely optional.
Animating the Time Lapse in Photoshop
Now we are ready to animate. For this, I just want a simple push-in.
I am happy with the frame where it is, so at the beginning of the video I will press the stopwatch icon for POSITION to create a keyframe. As shown below.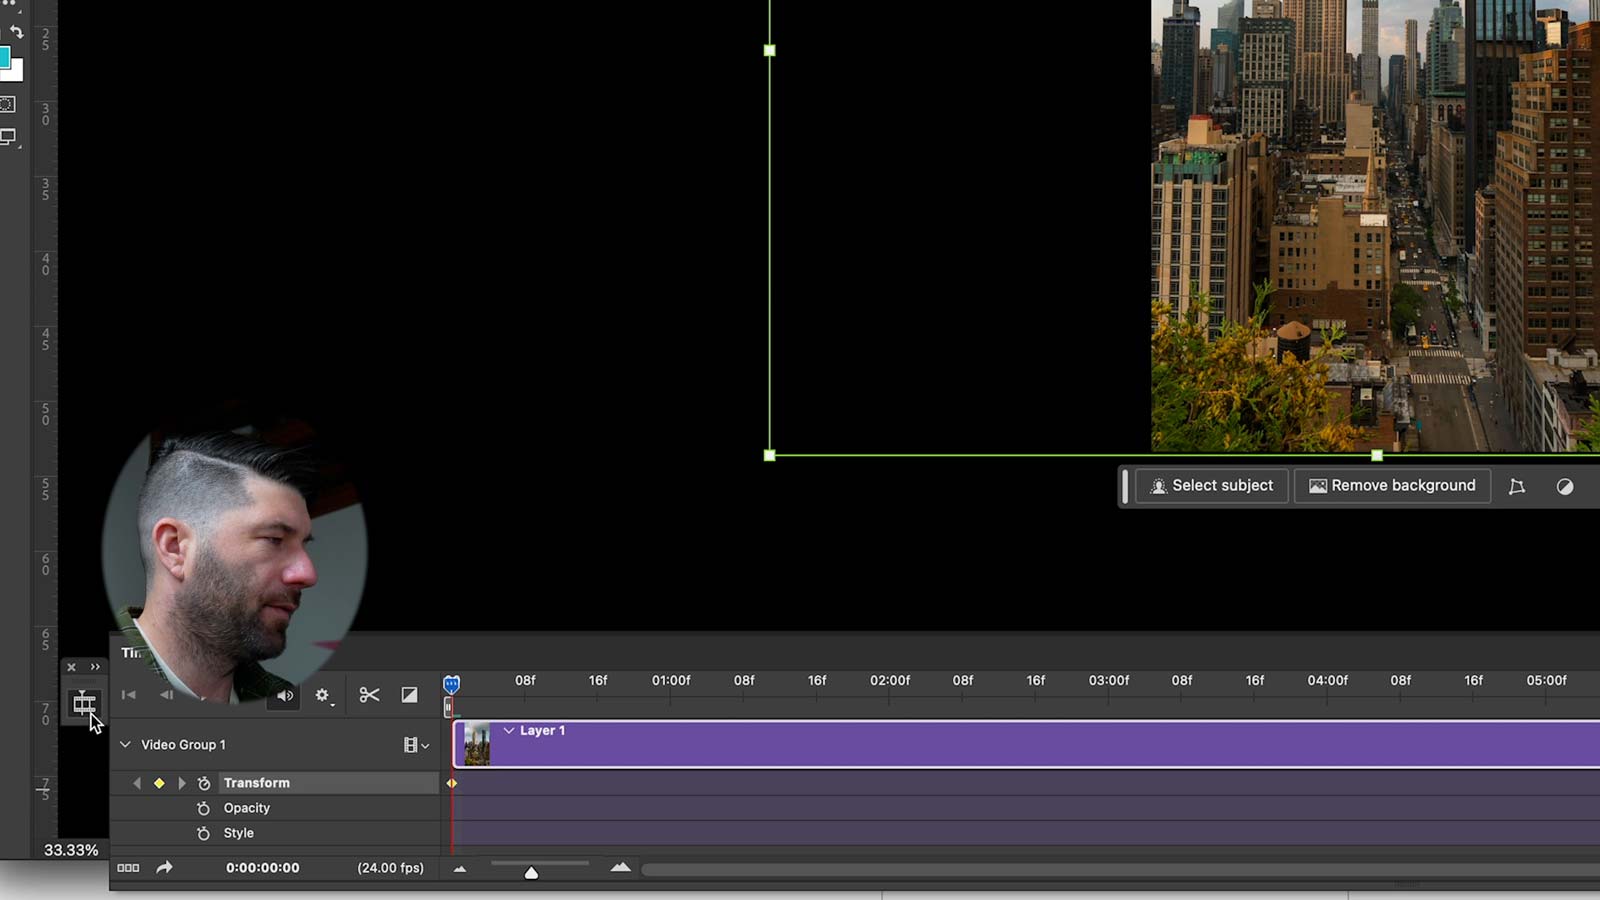
Then I will go to the far right of the timeline and drag my cursor to it. Press command T (control T on PC) and make it how I want the video to end.
Be sure to press the stopwatch.
You can now preview your time-lapse. Note it will have to re-render a preview every time we make a change. So continue editing using any layer styles you like as a part of your normal photo work flow.
Once happy, preview it, and then it’s time to Export our finished timelapse in Photoshop.
Exporting our Time lapse in Photoshop.
Exporting our time lapse (or any video) is pretty simple.
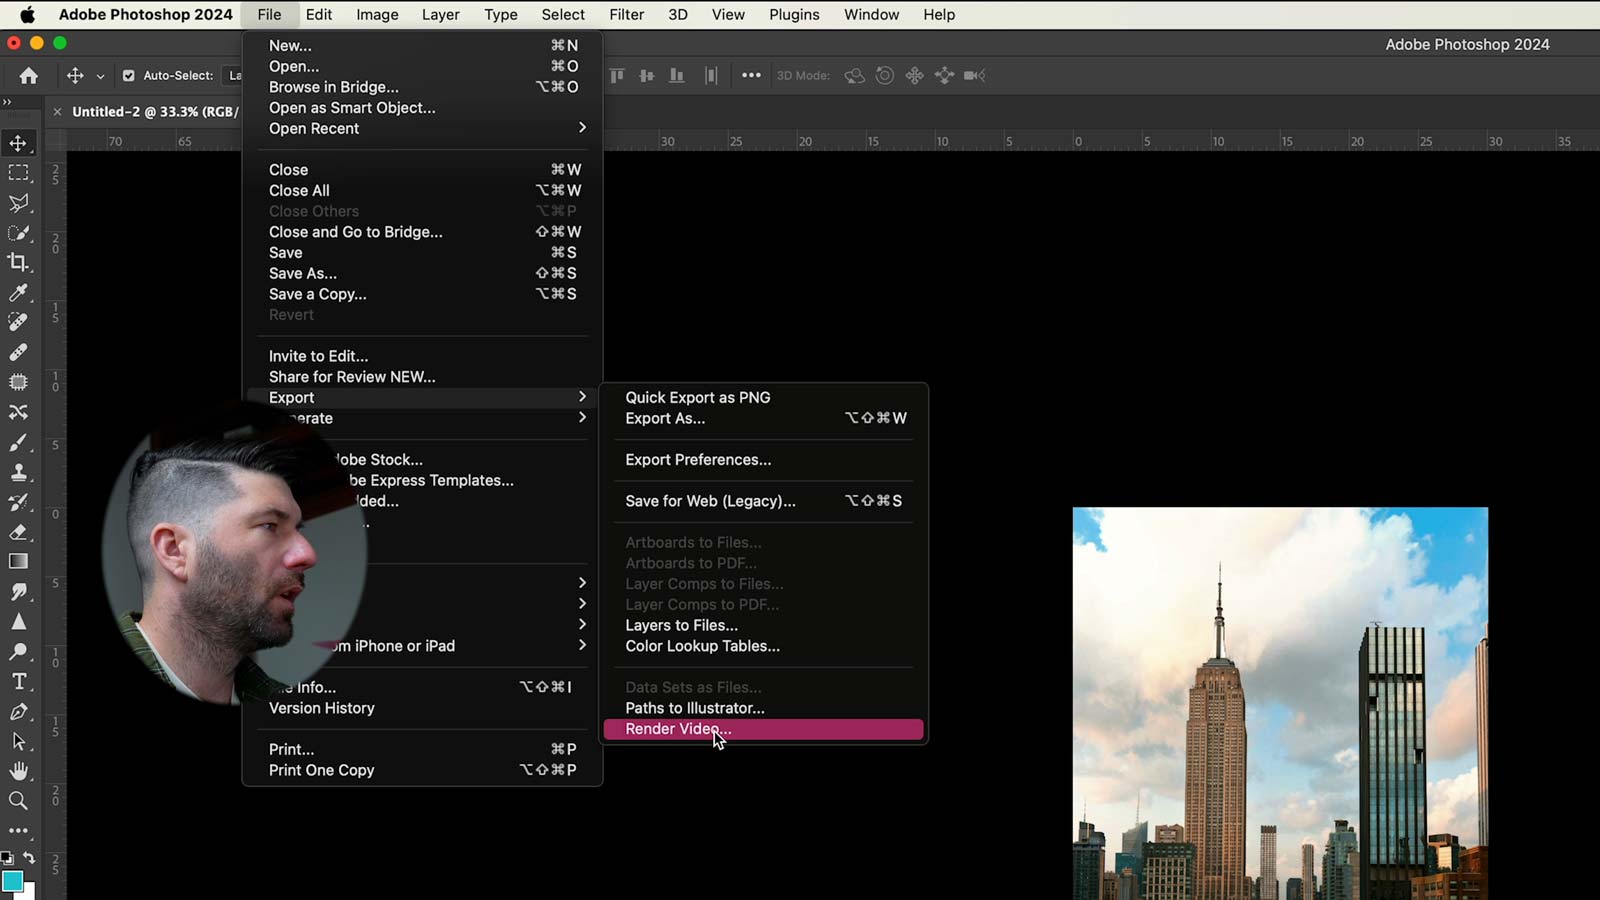
Navigate to File>Export>Render video as shown in the picture above.
Once there a new pop-up dialogue will appear. The most important thing here, is if you’rs DOES NOT SAY ADOBE MEDIA ENCODER, click on it and change it to adobe media encoder.
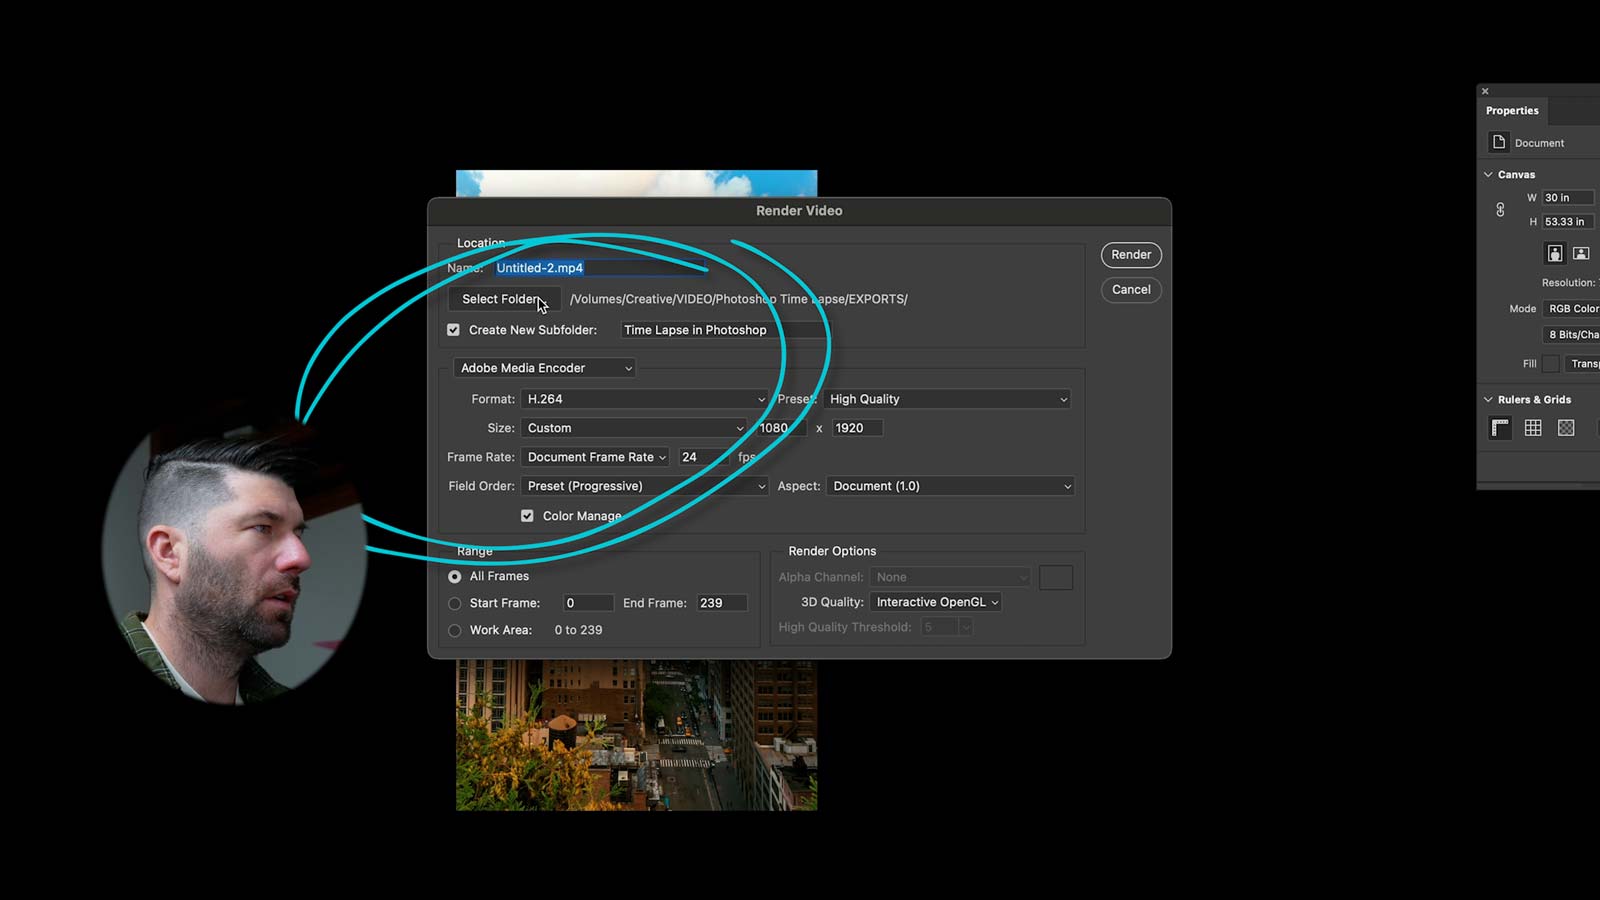
Make all your settings how you want. I like h.264 and HIGH QUALITY. Everything else should be exactly what your canvas settings were and we already dealt with that so this is just to confirm you’re happy.
Press render and Voila, you now have exported a time lapse in Photoshop and are ready to share on your favorite platforms.
Final Thoughts
This is handy if you don’t want to invest in Premiere and After Effects and you just want to be able to export some timelapse as you took and have the ability to edit them like you would in Photoshop.
If you find yourself wanting more control over it, I’d learn how to bring my workflow to After Effects, because there you import raw images and have a lot more animating options.